


Q: "I'm making a vlog of my last trip, and I would like to put some pieces of songs that I've purchased from Apple Music. The video editor I'm using is Adobe Premiere Pro. It doesn't allow me to add any of the songs that are downloaded from Apple Music. Is there a way to add Apple Music to Adobe Premiere Pro?"
A beautiful melody helps a video project more vivid and appealing. That is why video makers love to add background music to their video clips with Adobe Premiere Pro (Pr). However, many pieces of songs you downloaded or purchased from Apple Music can't be added to Premiere Pro. And do you know why?
With the purpose of adding Apple Music to Adobe Premiere Pro, we will analyze this issue and would like to share two practical solutions to help you achieve the goal.
- Part 1. Can You Add Apple Music to Premiere Pro/Rush Directly
- Part 2. How to Download Apple Music for Premiere Pro
- Part 3. Add Apple Music to Premiere Pro/Rush without Premium
- Part 4. Other Way: How toImport Apple Music to Premiere Pro from iTunes
- Part 5. More FAQs about Apple Music Premiere Pro Integration
- Part 6. In Conclusion
Part 1. Can You Add Apple Music to Premiere Pro/Rush Directly
No. You cannot import songs downloaded from Apple Music or iTunes to either Premiere Pro or Premiere Rush due to copyright protection and incompatibility. Apple Music songs including the downloads are encoded with protected M4P and ALAC formats. However, Premiere Pro and Rush support uploading MP3, WAV, M4A, and more common formats, which don't cover M4P or ALAC.
But you can get Apple Music songs in compatible formats with Premiere by buying Apple Music content from iTunes or converting them. Please read on to explore more details.
Part 2. How to Download Apple Music for Premiere Pro
Owing to the DRM in Apple Music tracks, listeners are restrained from copying the digital media files that they have downloaded. Beyond that, Apple Music also avoids the unauthorized republishing of digital content. So, it is very important for you to find an Apple Music Converter that can unlock the DRM restriction from the downloaded Apple Music songs.
Now, I am willing to share this useful and powerful converting tool for you, namely the AudFree Apple Music Converter. Specialized in removing DRM from Apple Music streams, it can convert all content from Apple Music to commonly-used formats. It includes six options: MP3, WAV, AAC, FLAC, M4A, and M4B. This advanced converter is also capable of saving original quality and raw metadata info such as artist, album, title, and so on.
| Apple Music Format | M4P(encrypted AAC), ALAC |
| Premiere Pro | WAV, MP3, M4A, AAC, AIFF, AIF, ASND, OMF, 3GP, 3G2 (. 3gp), and BWF |
| Premiere Rush | WAV, MP3, M4A |
| AudFree Auditior Can Convert To | MP3, WAV, M4A, AAC, FLAC, M4B |
It entitles you to transfer unlimited tracks to local DRM-free files at one time. Also, with 30X ultra-fast converting speed, it will convert your added content quickly beyond your imagination. With the great support of this smart program, it is super easy to load Apple Music audio files to Premiere Pro.

How to Convert Apple Music Tracks for Premiere Pro/Rush
Before you perform the conversion with AudFree Apple Music Converter, it is better to take the 2 preparatory works below down beforehand:
⚙️ Make sure that you have installed iTunes on the desktop and that the Apple Music subscription has not expired.
⚙️ Please download Apple Music songs to iTunes with your current Apple Music account.
Then let's start the conversion with the following 3 steps.
- Step 1Drag songs from Apple Music Library to AudFree Auditior
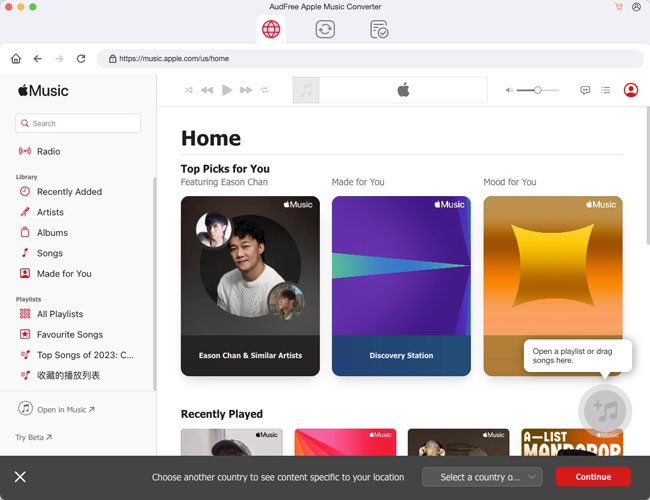
- Open AudFree Apple Music Converter on the desktop and iTunes will launch afterward. Then discover which track, album, or playlist you would like to convert and add to Premiere Pro/Rush. Next, directly drag and drop the media files from Apple Library to the empty space of this Apple Music downloader. Or you can click the 'Load iTunes Library' icon on the lower-left corner of the main interface to add the music files to the converter. You can also click on the 'Edit' icon on each item to personalize the ID3 tags.
- Step 2Customize Apple Music output settings for Pr

- Once the downloaded Apple Music tracks are added to AudFree software, you are allowed to change the output parameters as you prefer. Find and hit the 'Format' tab on the left of the big 'Convert' button. On the page of 'Format Setting', you are supported to convert Apple Music to MP3, M4A, AAC, FLAC, WAC, or M4B. Then modify the other parameters such as codec, channel, sample rate, and bit rate. Or you can simply select the auto mode named 'High Quality'.
- Step 3Convert Apple Music for Premiere Pro
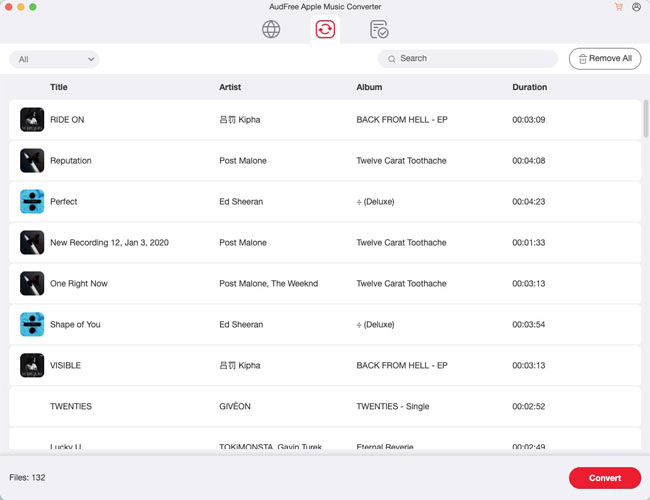
- Now, just press the big 'Convert' button in the bottom right corner. The program will work at 30X speed to get rid of the DRM from Apple Music songs and decode them to the selected format. The converting period lasts depending on how many tracks you added to the tool. When it is over, please remember to locate the local folder by clicking the on-screen prompts or the 'Converted' button.
Part 3. How to Add Apple Music to Premiere Pro/Rush without Premium
Now you are able to load Apple streams to video as background music in Premiere Pro. The process can be incredibly simple. Just follow the steps as follows:
Step 1. Open the Premiere Pro app and add a video clip to the timeline that you'd like to add Apple Music to as BGM.
Step 2. Go over to the left Project panel and double-click inside. Alternatively, click on 'Local Drives' > 'Import'.
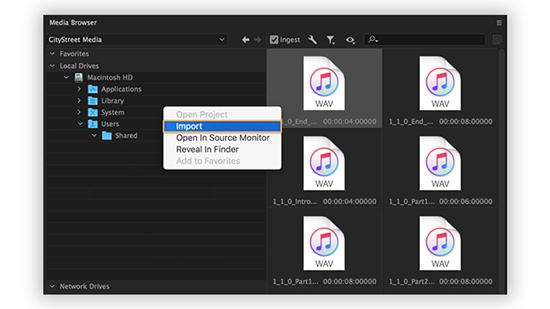
Step 3. From the pop-up import window, find the converted Apple Music files and click 'Open'.
Step 4. Drag the added Apple Music audio clip onto a track below your video clip on the timeline.
Step 5. Use the razor tool to cut off the end of your Apple Music clip. This way, your music can end when your video does.
Part 4. Other Way: How to Add Music to Premiere Pro from iTunes
Apart from converting Apple Music content to Premiere-supported audio formats, there is also another solution to add Apple Music. That is to buy songs of Apple Music from the iTunes library. Generally speaking, the purchased tracks of Apple Music will be stored as local files in unprotected AAC format. Thus, you can use those files anywhere including in Premiere Pro.
Now, let's show how to do that:
Step 1. On the iTunes desktop app, choose 'Music' > 'Preferences' from the top menu bar.
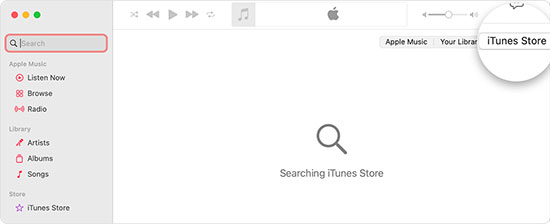
Step 2. Proceed to touch on 'iTunes Store' from the upper right corner.
Step 3. Search for your loved Apple Music tracks or albums you'd like to add to Premiere Pro and press on the price next to them.
Step 4. Use your Apple ID credentials to end the process. Afterward, you can find them in your iTunes library.
Note: Besides the above way to purchase Apple Music songs from iTunes, there are also other channels to make it. Please see also: How to Buy and Download Music from iTunes to get more details.
Part 5. More FAQs about Apple Music Premiere Pro Integration
Q1: How to fade out Apple Music in Premiere Pro?
A: To fade out and use Apple Music on Premiere Pro, you can follow these steps:
Step 1. Selected Apple Music audio clip in the timeline that you want to fade out. You can opt to cut the clip to the length of your credits.
Step 2. Go to the Effects window from the left panel, and you can do lots of different fades on the added Apple Music clip.
Step 3. Expand the Audio Transitions folder. Under this folder, you can get Crossfade which includes 3 distinct music fades.
Step 4. Click and drag the Constant Power transition among the 3 options to the start or end of the audio clip.
Step 5. Adjust the duration of the transition to your desired length.
Step 6. Preview the clip to make sure the fade-out effect is applied correctly.
Q2: How to remove background noise in Premiere for Apple Music?
A: You can make it by following the below how-to guide:
Step 1. Tap on the 'Audio' option from the top navigation bar of PR.
Step 2. On the right Essential Sound panel, choose 'Dialogue' and open the 'Repair' tab.
Step 3. Here are 5 options to remove the background noise from Apple Music audio in Premiere Pro: Reduce Noise, Reduce Rumble, DeHum, DeEss, and Reduce Reverb.
Part 6. In Conclusion
We have discussed two solutions on how to add Apple Music to Premiere Pro or Rush. You can buy Apple Music from iTunes. Or if you hope to save money, please give priority to the AudFree Apple Music Converter. It facilitates you to convert Apple Music-protected ALAC or M4P files to common MP3, AAC, and more options. And you can find the answer on how to use Apple Music in Premiere Pro and Rush from the FQAs part. Now, install it to kick off your music experience on Premiere Pro.

James Blair

Staff Editor

